
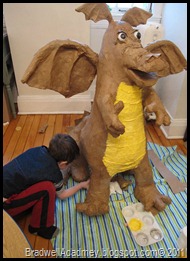
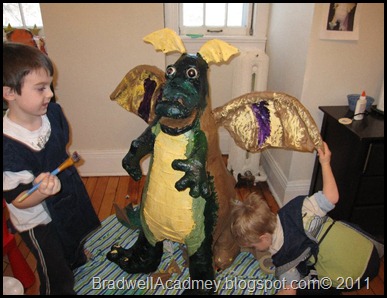
Isn’t he cute?
We recently moved to an old Victorian house that our kids nicknamed the “castle”. (Psst. Don’t tell them it isn’t a real castle, the WILL argue with you.) Dylan decided we should make an enormous dragon so that its head was sticking out of the top story and into the house and his tail was wrapped around the outside. While I think that is a fabulous idea, my husband didn’t agree and so we came up with Fred.
The idea was inspired by Gourmet Paper Mache’s incredible paper mache art. This guy is AMAZING, a true artist. The boys have watched all of his videos countless times.
Creating the dragon was easy and almost 100% kid made. I did interfere once and poor Fred now has six legs because of it! Guess I should have listened to the 6 year old. Oops.
Supplies needed:
- Tomato Cage
- Plastic grocery bags (or any other materials you wish to recycle
- Masking tape, LOTS of masking tape
- Paper for the outside. We reused the craft paper from our move, but paper grocery bags or “craft” paper would work just as well.
- Elmer’s Paper Mache Paste. I don’t mess with that flour/water stuff….too messy for me.
Step 1: Flip the tomato cage upside down.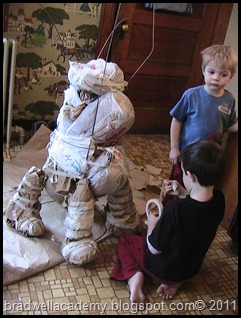
Step 2: Fill plastic bags with paper (or other plastic bags) and tape them together to form the bulk of the body. It doesn’t need to be perfect at this point. Just get it on there.
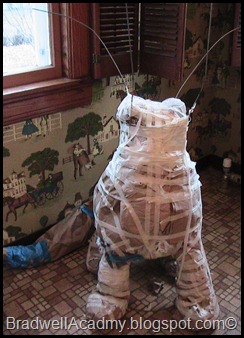
Step 3: Add paper and tape and then MORE paper and tape and even MORE paper and tape until you start to create a shape you like. Honestly, I cannot tell you how hard it was for me to stay our of the way and let the kids have at it. I just kept taking biting my tongue and drinking Chai Tea and it turned out fabulous…even without my “help.” Dylan is my little perfectionist and kept putting on more layers until he thought it was just right.
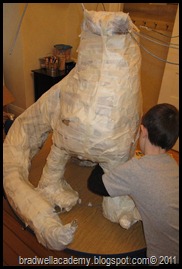


Step 4: Paper Mache. We use Elmer’s Paper Mache Paste for all of our paper mache. I just can’t deal with the goopy, powdery mess flour makes. Elmer’s Paper Mache Paste is cheap, can be stored for future use and is WAY cleaner.



Step 5: Paint. Acrylics (yes, the paints that stain clothes) are the best. Otherwise, you’ll need to cover your finished creation with Modge Podge.
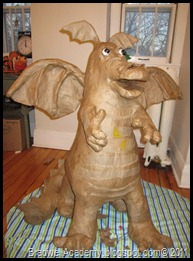
Have Fun! We are already starting to plan our next project!


